JPG vs PNG: Which Format to Use (and When Converting Helps)
Choose between JPG and PNG for photos, graphics, transparency, print and upload limits, and learn when converting helps and when it cannot.
Written by the Pixoate team. We check how each tool behaves before we describe it, and we date any prices or portal rules we quote.
You have a JPG and something wants a PNG, or the other way around. Before you convert, it helps to ask what the file has to do, because the two formats solve different problems. Swapping one for the other fixes some of them and none of the rest.
The short answer: use JPG for photographs and anything that has to stay small. Use PNG for screenshots, logos, line art and text-heavy graphics, for anything that needs a transparent background, and for a picture you will edit and save again and again. Converting changes the container, not the picture inside it.
Pick the format by the job
| The file is | Choose | Why |
|---|---|---|
| A photo to email, post or upload | JPG | Smooth photographic detail compresses well, so the file stays small |
| A screenshot, chart or logo with flat colors and sharp edges | PNG | Edges and small text stay crisp, where JPG adds fuzz around them |
| A graphic that must sit on different backgrounds | PNG | JPG cannot store transparency |
| A picture you will crop, layer or edit several times | PNG while you work | Each JPG save compresses the picture again, and PNG does not |
| A picture for a form that says "JPG only" or sets a small size cap | JPG | Check the rule first, then the size |
What separates them
Compression. JPG is lossy. It throws away fine detail the eye is least likely to miss, which is why photos shrink so much. PNG is lossless and keeps every pixel exactly as it was.
Transparency. PNG can hold transparent pixels. JPG cannot, so a transparent PNG saved as a JPG gets a solid fill, white unless you choose another color.
Text and edges. Hard contrast, such as black letters on white, is where JPG compression shows first, as fuzz or faint ghost marks around the letters. A photograph hides the same artifacts in its texture.
File size. A PNG of a photograph is much larger than a JPG of the same photograph. A PNG of a flat logo can be smaller than a JPG of it. Test with your own file instead of assuming.
When converting helps
Converting a JPG to a PNG makes sense when:
- You are about to edit the picture several times. Convert once, work in PNG and the picture stops losing detail with every save.
- A template, editor or form accepts PNG only.
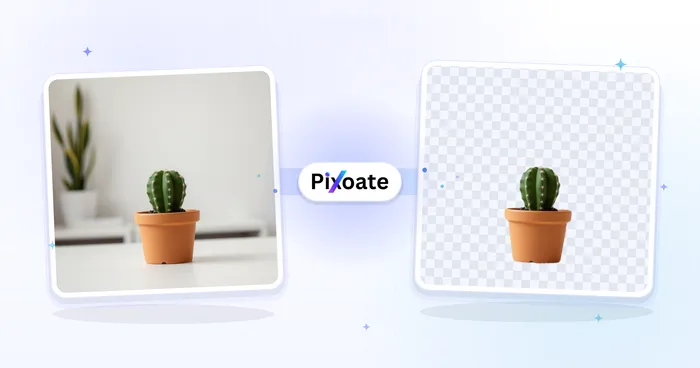
- You plan to add a transparent background later. A JPG has none to keep, so cut the subject out with the transparent PNG maker, which accepts your JPG directly.
Converting a PNG to a JPG makes sense when:
- A screenshot or photo saved as PNG is far larger than it needs to be.
- A form, email service or marketplace asks for JPG.
- The picture has no transparent areas you need to keep.
When converting cannot help
JPG to PNG does not restore detail. The PNG holds exactly the pixels the JPG held, including the blocks and smears that compression left behind. Blur, noise and a low pixel count all come through unchanged. A PNG made from a JPG is larger, not better.
It does not add transparency. The white or colored background in the JPG stays as it is. Only a cutout makes it see-through.
PNG to JPG cannot return transparency. Once the transparent areas are filled, they are gone from that copy.
Converting back and forth adds loss. JPG to PNG and back to JPG applies a fresh lossy save at the end. Keep your first file and always convert from it.
Convert in a minute
For JPG to PNG:
- Open JPG to PNG and upload a JPG or JPEG file.
- Leave Output format on PNG and select Convert to PNG.
- Select See result, then Download.
The PNG keeps the width and height of the JPG, and the saved file keeps your name with a Pixoate_ prefix.
For PNG to JPG:
- Open PNG to JPG and upload a PNG.
- Leave JPG quality at 90, or raise it when the picture holds small text.
- If the PNG has transparent areas, choose a Background fill color that matches where the JPG will sit.
- Select Convert to JPG, check the size badge, then select See result and Download.
Print and upload limits
For print, the pixel dimensions matter more than the file extension. A high-quality JPG and a PNG with the same pixels look the same on paper, so follow your print shop's list of accepted formats and its minimum pixel size.
For uploads, a form usually checks the format, the pixel size and the file size as three separate rules. Work in that order: choose the format, set the pixel size if the form names one, then shrink the file. If it is still too heavy, compress the image to a size in KB.
Check the converted file
Open the new file next to the original at actual size (100 percent zoom). Look at the edges of letters, thin lines and smooth gradients such as a sky. For a PNG that was meant to be see-through, view it over a dark background to make sure no white halo remains. Then compare the file sizes and keep the original.
Here is an invented example
A small business owner has three files: a product photo, a screenshot of a price table and a logo with a see-through background. The photo goes out as JPG, because the file stays small and the detail is photographic. The screenshot stays PNG, because the small numbers should stay crisp. The logo stays PNG, because JPG would fill the transparent area. If the website later complains about the weight of the screenshot, check whether it contains a photo; if it does not, compress the PNG instead of swapping the format.
A quick way to test with your own file
If you are unsure, save the same picture both ways and compare, instead of trusting a rule of thumb. Convert once to PNG and once to JPG, then put the two next to the original at actual size. For a photograph, the JPG is usually far smaller and looks the same. For a screenshot with small text, the PNG often wins on both counts, because flat areas pack well and the letters stay sharp. If the two files are close in size, pick PNG for anything you may edit later and JPG for anything you will only send. Whichever you choose, name the copies clearly so the original is never overwritten.
Related guides
When file size is the sticking point, compressing a JPEG or PNG without visible loss covers the trade in detail. For a document made from images, see converting JPG or PNG to PDF. More everyday file jobs are collected in our photo and PDF task guides.
Frequently asked questions
Is PNG higher quality than JPG?
Not by itself. PNG is lossless, so it keeps whatever pixels it is given, but a PNG made from a JPG cannot be better than that JPG. A high-quality JPG of a photo often looks the same on screen while being much smaller.
Should I save screenshots as JPG or PNG?
PNG when the screenshot has small text, menus or thin lines, because they stay clean. JPG when the screenshot is mostly a photograph and the size matters more than perfect edges.
Does the format matter for printing?
Less than the pixel count does. Ask the print shop which formats it accepts and what resolution it needs. If both are accepted, PNG avoids another lossy save, and JPG gives a smaller upload.
Can I just rename a JPG to .png?
Renaming changes the name, not the data. The file is still a JPG inside, and software that checks the real content may reject it or display it wrongly. Convert the file instead, so the contents match the extension.
Decide what the file has to do first, then convert the JPG to PNG or the PNG to JPG, and keep the original beside it.