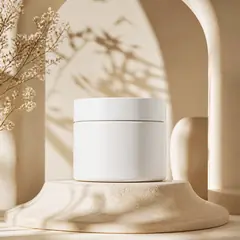
How to Create Lifestyle Product Photos Without a Photoshoot
Build a believable scene around a real product photo, check scale, shadows and details, and keep lifestyle images honest and secondary to accurate shots.
Written by the Pixoate team. We check how each tool behaves before we describe it, and we date any prices or portal rules we quote.
A white-background photo shows what a product looks like. A lifestyle photo shows what it is like to own: the mug on a breakfast table, the bag on a shoulder, the lamp in a living room. Shoppers use that context to imagine the product in their own lives, which is hard to do from a plain cut-out.
A lifestyle shoot used to mean props, a location and a photographer. Today you can build a believable scene around a product photo you already have. This guide shows how to do that without misleading buyers.
The essentials
- Start with a clear, well-lit photo of the real product.
- Decide what the scene needs to say: use, size, mood or setting.
- Create a scene around the unchanged product.
- Check scale, shadows, color and details against the real item.
- Use lifestyle images as supporting photos, next to accurate product shots.
Decide what the scene is for
A lifestyle image should answer a question a buyer has. Examples:
- Use. How does this get used? A kettle on a kitchen counter, a backpack on a trail.
- Size. How big is it? A candle beside a book, a ring on a hand.
- Mood. What style is it for? A minimalist lamp in a calm bedroom.
- Setting. Where does it belong? A planter on a sunny windowsill.
If a scene does not answer a question, it is decoration, and the space is better used for another product detail.
Start with a good source photo
The scene is only as convincing as the product inside it.
- Shoot the product in soft, even light, with the whole item visible.
- Use a plain surface, so edges are easy to separate.
- Keep the camera level and fill most of the frame.
- Take a sharp image, because softness shows when the item is placed into a scene.
- If the picture is small, enlarge it first with the Image Upscaler.
If you also want a clean cut-out version, see how to remove the background from a picture.
Describing a scene in plain, concrete words
The quality of a generated scene depends heavily on how clearly you describe it. Vague instructions such as "make it look nice" leave too much to chance, while concrete ones give a clear target. Name the surface, the room, the light and the mood. For example: "on a light oak kitchen counter beside a window, soft morning light, a small plant and a folded linen cloth in the background, calm and minimal."
It helps to include what should stay the same: the product itself, its color and any text on it. Keep the number of extra props small, since busy scenes distract from the product and increase the chance of odd details. If the first result is not right, change one thing at a time, such as the surface or the light, so you learn what each instruction does. A short, steady approach produces better results than a long, complicated description.
Create the scene
Open Lifestyle Product Photography and upload your product image. It is built to create a believable lifestyle scene around the unchanged product, including natural-looking shadows where it touches the surface. Check that it has. Describe the setting in plain words: surface, room, light and mood. Keep the description short and concrete.
For a catalog-style scene without a full setting, the AI product scene generator is the editing tool these pages are built on.
Matching the scene to the buyer
A scene works when it fits the person likely to buy. A minimalist ceramic vase looks right on a clean windowsill or a pale shelf, and wrong in a crowded, colorful kitchen. A rugged water bottle belongs on a trail or a gym bag, not a lace tablecloth. Thinking about who buys the product and where they would use it saves many failed attempts.
It also helps to think about the story behind the image. A candle in a cozy evening setting says relaxation. The same candle in a bright spa setting says self-care. Neither is wrong, but they appeal to slightly different buyers, so pick the story that matches the way you want the product to be seen, and keep it consistent across your store.
Review the result closely
Generated scenes can look right at a glance and wrong up close. Check:
- Scale. Is the product the right size compared with the objects around it?
- Shadows and contact. Does it sit on the surface, or does it float?
- Color. Does the product look the same color as in real life?
- Details. Are labels, logos, buttons and edges the same as the real item?
- Plausibility. Would the scene exist in a real home or shop?
- Extras. Are there props that suggest the buyer will receive more than they do?
Reject results that alter the product, and try again with a simpler description.
Keep lifestyle images honest
A lifestyle image is a promise about the product. Avoid these mistakes:
- Making the product look larger or more premium than it is.
- Showing accessories, sizes or colors that are not included.
- Changing material, finish or texture.
- Using it as the only image, with no accurate product shot.
Follow the current image rules of each marketplace or store, because they differ. Many allow lifestyle images as secondary photos while expecting a plain main image.
Build a small set
A good listing might have a clean main photo, two detail shots, one scale image and one or two lifestyle scenes. Use the same product photo across scenes, and vary the setting. Keep your originals so you can create new scenes later for seasonal campaigns.
An example set for one product
Take a simple stoneware mug. A sensible set might include a clean main photo on a plain background for the marketplace, a close-up of the glaze, a scale shot in a hand, and two lifestyle scenes: one on a breakfast table with morning light and one on a desk beside a laptop and a notebook.
Each image answers a different question. The main photo shows what it is, the close-up shows quality, the hand shows size, and the two scenes show how it fits into different parts of someone's day. Together they make the listing feel complete without repeating each other. When you plan your own set, aim for that variety, and cut any image that says the same thing twice.
Using scenes across seasons and channels
One of the best things about building scenes around an existing photo is that you can reuse the product in many settings. A candle can appear in a cozy autumn scene, a bright spring one and a festive winter one, without a new photoshoot each time. That is useful for seasonal campaigns, email newsletters, social posts and ads, where fresh images keep audiences interested.
Keep a record of the scenes you use and where they appear, so you can see what works. If a scene on a social post attracts more attention than another, try a similar one on your listing. Always keep an accurate, plain image of the product available, and make sure each scene would not mislead a buyer about size, color or what is included. Variety should add interest, not confusion.
Related guides
For a full at-home setup, read how to take professional Amazon product photos at home. For handmade items, see how to take better Etsy product photos. For feeds and posts, see how to create professional social media photos with a phone.
Frequently asked questions
Can AI create lifestyle product photos?
Yes. It can place your real product in a believable scene. Review scale, shadows and details, and treat the result as a supporting image.
Will it change my product?
The scene is built around the unchanged product, but you should still compare every result with the real item and reject anything that differs.
Can I use lifestyle images as my main listing photo?
Check the marketplace's current rules. Many require a plain background for the main image and allow lifestyle images in other slots.
How many scenes should I make?
A few. Each should show a different use, size or setting, so every image answers a question.
One accurate product photo can become a whole set of scenes. To build your first one, open Lifestyle Product Photography and describe the setting in plain words.