Pixoate Photo Editor: Resize, Animate and Create with AI
Explore Pixoate Photo Editor: resize a canvas, add text and illustrations, use AI photo effects, animate designs and download sharper images.
A good photo is often only the beginning. A café needs a square announcement, a tall story and a menu graphic. A seller needs a clean product image and a more expressive promotional design. A family might want to turn an old photograph into a birthday invitation with readable text and a little movement.
The awkward part is keeping everything editable while you change the format, improve the picture and try different ideas. Pixoate Photo Editor brings photo adjustments, AI tools, text, illustrations, backgrounds, layers and animation into one browser workspace.
This guide explains how to use that combination: resize a canvas after designing, make sharper downloads, animate individual elements and build something more personal than a photo with a filter.
What can you make with Pixoate Photo Editor?
Start with Edit my photo to work from an image, or Create design to begin with a canvas. You can add your own uploads, choose a template and build a composition from separate objects.
Here are useful starting points for an online photo editor with layers and AI effects:
| Your project | Features that help |
|---|---|
| A café promotion in several shapes | Canvas presets, custom dimensions, editable text and backgrounds |
| A product photo with space for a headline | Background removal, AI expansion, layers and text placement |
| An animated event announcement | Text and illustration layers, entrance and exit motion, MP4 or GIF download |
| A coordinated set of shop photos | Light and colour adjustments, reusable adjustment recipes and batch output |
| A family invitation or milestone design | Photo uploads, frames, illustrations, text styles and multiple pages |
| A sharper version of a finished graphic | Larger design downloads, with AI upscaling available for the underlying photo |
The strongest starting point is a specific message: what should someone notice, understand and do when they see your design?
Resize a canvas online without rebuilding the design
You finish a square promotion, then realise you also need a portrait version. Starting again means repeating the photo placement, heading, colours and decorative details.
In Pixoate's design editor, open Size. Choose a preset or enter a custom width and height, then select Resize document. The existing composition scales proportionally to fit the new canvas. Full-canvas background layers and borders follow the new document size.
This is useful when you want to change a design's canvas size online while keeping its text, photos and elements editable. Resizing applies to the document, including its pages, so save the version you want to keep before making a different format.
Try a simple workflow:
- Build the main message on a square canvas.
- Open Size and choose a portrait preset or your own dimensions.
- Review the space above and below the composition.
- Reposition the heading, enlarge the main image if appropriate and move the call to action.
- Preview at a readable size before downloading.
Fitting a layout into a new shape preserves its proportions; it does not automatically redesign the spacing for you. A tall story usually benefits from more vertical separation than a square card. On a phone, use the same Size controls and zoom in to inspect the text after resizing.
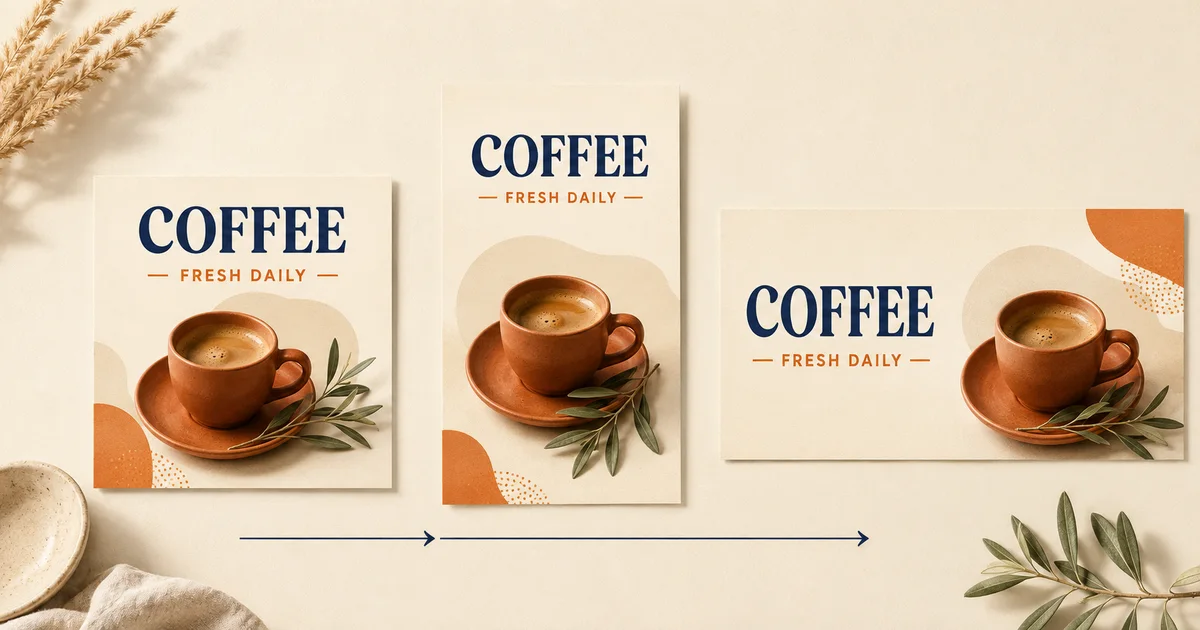
AI-generated design examples illustrating different canvas shapes. These are concepts, not screenshots or automatic-resize results.
Canvas resizing, photo resizing and AI expansion solve different problems
Change the canvas when the entire design needs a different shape. Use the dedicated tool to resize a photo to exact pixel dimensions when you only need to change one image's output size.
If the photograph itself needs more scenery above, below or beside the subject, use the editor's AI expansion options or the landscape-to-portrait photo converter. AI expansion creates new image content, which needs a visual review. It is a different operation from fitting existing layers onto a larger canvas.
Make sharper downloads: AI upscaling versus larger design exports
Two different problems can make a download look soft: the source photograph may be small, or the whole design may have been exported at too few pixels.
AI upscaling works on the photo. It increases image resolution and estimates additional detail. The editor includes an Upscale action; the separate AI image upscaler for low-resolution photos offers a focused workflow when preparing an image before adding it to a design. Compare faces, packaging, lettering and fine textures with the original before using the result.
A larger design download works on the composition. In Download, the size controls offer 1×, 2×, 3×, 4×, 6× and 8× where the canvas dimensions allow them. Text and vector elements are rendered at the larger output size, rather than simply enlarging a flattened 1× download.
For example, a 1,000 × 1,000 design can produce a 2,000 × 2,000 image at 2×. A 6× version reaches 6,000 × 6,000; 8× is unavailable for that canvas because scaled downloads have a 6,000-pixel limit per side. Downloads above 1× require Premium.
Larger export dimensions cannot guarantee that a small embedded photograph will reveal genuine detail. Improve the source photo where necessary, then choose an appropriate design export size. This two-step approach is helpful for invitations, promotional graphics and artwork that needs crisp lettering.
Improve light, colour and detail before adding a creative look
A heavy effect can hide the problem you actually need to fix. Start with a photo that is level, well framed and easy to see.
Pixoate includes crop and rotation controls, plus detailed adjustments for exposure, highlights, shadows, whites, blacks, temperature, tint, vibrance, sharpness, noise reduction and vignette. Tone curves and HSL colour controls give you more precise ways to work on contrast and individual colour ranges. Straightening and perspective controls help with tilted or uneven-looking compositions.
For a food photo, try correcting the colour temperature before increasing saturation. For a family portrait, lift dark shadows carefully and keep an eye on skin texture. For a product image, preserve the item's actual colour rather than choosing the most dramatic result.
You can also use Auto Enhance, or open the AI photo enhancer for dark or soft images for a dedicated enhancement task. The useful comparison is always your original versus the result at the size people will actually see.
Apply AI photo effects without losing your original direction
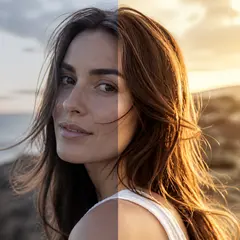
The Effects panel includes searchable creative and AI effects. Browse categories, inspect the sample previews, choose an intensity and press Apply to process the selected photo. The previews show the style on a sample; your own image is processed when you apply the effect.
Use the photo effects collection for creative image styles to explore related looks and their dedicated tools. A warm treatment can tie a seasonal café campaign together. A sketch-like treatment can give an invitation a handmade feeling. A graphic or cartoon treatment can make a pet portrait feel playful.
Keep the purpose in mind: a stylised promotional image and an accurate product listing have different jobs. Use creative treatments where interpretation is welcome, and keep a realistic version available when the image needs to describe the item faithfully.
Pixoate's Edit stack keeps image-edit versions available so you can compare, return to an earlier result or branch in a new direction. This makes experimentation less costly in creative terms: you can try a different look without treating the latest result as your only starting point. Processing another AI or effect result can still use your account allowance.
Describe an AI edit, remove distractions or create space for text
Sometimes the change you want is more specific than a preset: remove a distracting chair, replace the background, extend the image or create a product scene with room for a headline.
The editor's AI Tools panel includes quick actions and generative workflows. Edit by intent lets you describe a change and prepare the corresponding edit. Review the selected operation, prompt and any required selection or reference before pressing Apply.
Quick AI actions also cover background removal, colourisation, blemish removal, face retouching, avatar portraits and professional headshots. That makes it possible to prepare the photograph for a family card, staff introduction or creator profile before working on its surrounding design. Keep skin texture and identifying features believable when reviewing a portrait result.
The available workflow groups cover retouching and replacement, expansion and reframing, and business tasks such as product imagery, room staging and profile pictures. For local changes, paint the area that should be edited where the selected operation supports or requires it.
For example, a useful product-photo instruction is: “Replace the background with a pale studio surface and leave clear space above the mug for a headline.” Review the mug's handle, rim, shadow and markings afterward. A preservation control helps express your intention; it is still necessary to inspect generated details.
The dedicated AI image editor for background changes and object removal is another entry point when the image edit itself is your main task. Once the photo is ready, build the final message with editable text and design layers.
Add readable text, styled headlines and text behind a subject
Text turns a nice image into an invitation, an offer or a useful explanation. In Text, add a heading, subheading or body text, or choose a ready-made text design. You can adjust font, size, colour, alignment, line height and letter spacing, then use outlines, shadows and curved text where they help the composition.
Text-box controls include vertical alignment, fitting the box to its text and shrinking text to fit. Lists and editable tables are useful for schedules, small menus and clear information cards.
A few practical choices make a large difference:
- Keep the main headline short enough to understand on a phone.
- Put detailed information in a quieter area with consistent spacing.
- Use contrast between text and background before adding more effects.
- Check names, dates, currency symbols and contact details before exporting.
The Text Behind Subject workflow creates a photo layer, an editable headline and a subject cutout. That arrangement lets part of a person or product sit in front of the headline for a cover-style design. Keep the most important words readable even when the subject overlaps them.
If your task is simply a caption, date or label, add text to a photo online. For a fuller composition, keep working with the editor's layers so you can revise each part separately.
Build with illustrations, backgrounds, elements and layers
The editor's creative library gives you more ways to express an idea than a rectangular photo and a heading.
Illustrations and stock images help you explain a service, introduce a character or fill a gap when you do not have the right photograph. Elements include shapes, graphics, icons, flowers and decorative borders. Background offers solid colours, gradients and library designs. Some library content requires sign-in or a paid entitlement; check the item's access label before building around it.
A florist might pair a restrained botanical illustration with a real bouquet photo. A tutor could combine an illustrated character, a short checklist and a clear lesson heading. A birthday invitation might use a family photo, a decorative border and one prominent date.
The Layers controls make these compositions manageable. Bring objects forward or backward, hide or lock them, group related items, align them and distribute them evenly. Adjust opacity, shadows and blend modes for the selected object. A locked background is useful when you keep accidentally selecting it instead of a small caption.
Photo masks let you reveal or hide painted areas while keeping the source available. Shape clipping can place a photo inside a circle, rounded shape, star or hexagon without requiring you to permanently cut away the original image.
For a simple combination of two pictures, use the image overlay tool to combine photos. For a family collection with several images, the photo collage maker is a useful focused starting point.
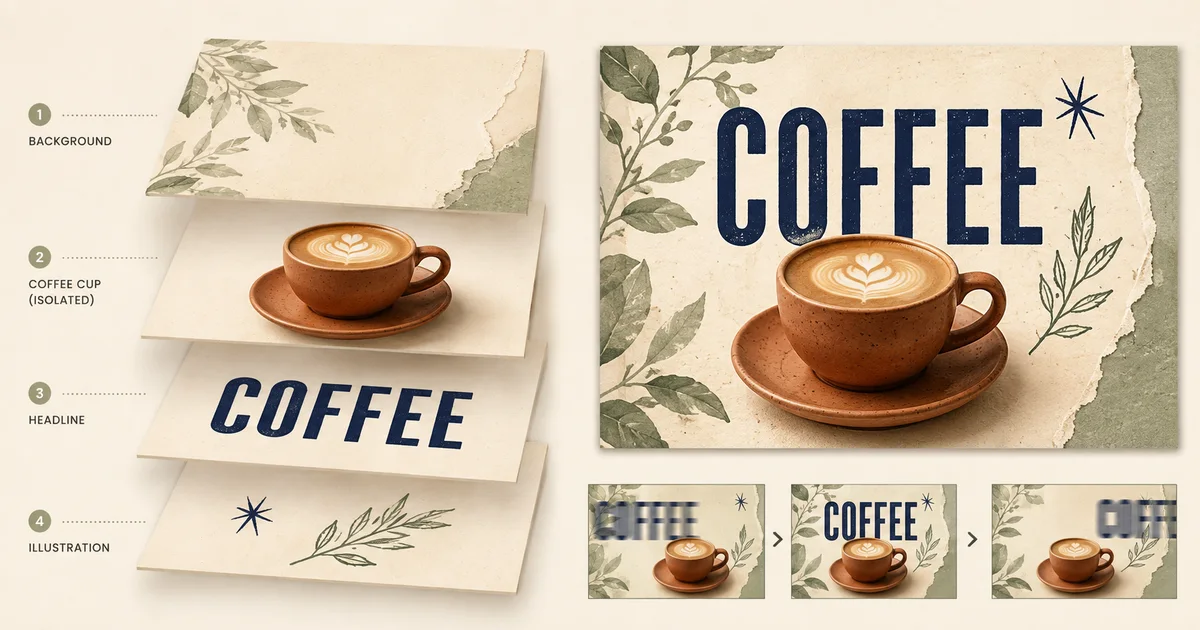
AI-generated illustration of a layered design and a headline moving through an entrance, hold and exit. It is a concept, not an editor screenshot or exported animation.
Animate text and design elements, then download MP4 or GIF
A still announcement can become a short moving design without starting an entirely separate project.
Select an element and open Animate. Browse the live motion previews, then choose whether the movement happens on Enter, Loop, Exit or Both. Fine-tune the controls available for that animation, such as timing, direction and easing, and use the canvas playback controls to review the sequence.
For a café announcement, let the headline enter first, give viewers time to read it, then introduce a small decorative accent. For a birthday invitation, keep the date visible while an illustration adds gentle movement. Animating every object at once usually makes the message harder to follow.
The separate Animations library provides animated assets you can add to a design. Their access requirements are distinct from applying motion to your own text and shapes, so check the library item's label and the download options.
Once the design contains motion, Download offers MP4 video and GIF animation. GIF export requires Premium, while MP4 uses the account's video allowance; premium assets can introduce additional export requirements. PNG and JPG downloads capture a still image rather than preserving motion.
If you have a sequence of existing photographs and want to assemble them into a GIF, use the GIF maker for a photo sequence. Choose the editor when you want individual text, photo and illustration layers to move within one composition.
Keep a consistent style across pages and photo batches
Repeated designs become easier when you reuse decisions instead of guessing the colours and fonts each time.
Templates provide a starting composition. Supported smart-template behaviour can fit your photo without stretching it and adapt colours and text contrast. Review the result, especially if the picture has very different lighting or composition from the example.
Styles includes colour palettes and font pairs. Premium brand kits let you save a combination for later designs. Pages lets you add and duplicate pages within a document, which is useful for a coordinated announcement series or a small set of information cards.
For photographs that need the same treatment, build an adjustment recipe on one image. You can apply those settings to other visible photos across the document. Batch apply can render a selected adjustment recipe onto a folder of images and provide a ZIP download.
That recipe covers photo adjustments such as light, colour, tone curves, HSL, detail and perspective. It does not copy the entire poster layout, AI-generated pixels, masks or crops to unrelated photographs. This makes it useful for consistent photo treatment rather than automatically producing a complete campaign from every file.
Save your work and return to a previous version
The editor keeps browser-based drafts for the current account or guest session. Signed-in cloud workspace features also provide saved designs and uploads, a visible sync status and version recovery.
Before changing devices, wait for the cloud save confirmation. A browser draft and a completed cloud save are different things. If saving is interrupted, use the available retry or recovery option before closing the work you need.
Use Undo and Redo for changes during editing, the image Edit stack for earlier photo-processing results, and cloud Version history for previous saved design revisions. These controls solve different recovery problems, which is useful when you are experimenting with a layout and its underlying photos at the same time.
Choose the right download format for the job
Pixoate's design downloads include PNG, JPG, WebP, AVIF, PDF and SVG, with MP4 and GIF available for animated designs.
| Download | A practical use |
|---|---|
| PNG | Graphics and text-heavy images, including transparency where supported by the design |
| JPG | Photographic designs where broad compatibility matters |
| WebP or AVIF | Web graphics when your destination accepts the format |
| A document to share or pass to a print workflow after checking its requirements | |
| SVG | A vector export for compatible workflows; embedded photographs remain raster images |
| MP4 or GIF | Motion designs, subject to the selected format and account access |
Sign-in is required to download. Larger design scales, SVG and GIF exports require Premium. Premium backgrounds can also affect watermark and format options; check the export notice for the actual design you have made.
For shop imagery, the editor's Listing check can flag supported dimensions, composition and overlay issues for the selected destination. It is a review aid, not a guarantee of marketplace acceptance. Confirm the downloaded file's actual format and size before uploading it.
When a finished still image is too large for its destination, compress an image for a website or upload limit, then inspect fine text and product detail again.
Why choose Pixoate as a Canva alternative for photo-based designs?
The most useful comparison is the work you need to finish. For someone searching for a Canva alternative with AI photo effects, Pixoate is a strong fit when the job combines photo preparation, editable design and motion.
Its practical advantage over a workflow built from separate single-purpose tools is continuity. You can improve a photograph, try a creative effect, add a background and editable headline, resize the document and animate the message within the same editor.
That combination is especially useful when:
- Your design begins with a real photograph that needs retouching or reframing.
- You want separate control over the photo, text, illustration and background.
- You need to adapt a finished composition to another canvas shape.
- You want both a still image and an animated version of the idea.
- You value earlier image results, reusable styles and saved design versions while experimenting.
For specialised work, compare the exact export requirements, asset access and editing controls you need. Pixoate's appeal here is the connected photo-to-design workflow, rather than a claim that one editor wins every possible task.
Try one creative brief before making ten different designs
Choose a small, real project: a weekend café special, a new product announcement or a family celebration. Open the online photo editor for social posts and animated designs and work through this sequence:
- Add the best available photograph and correct its framing and light.
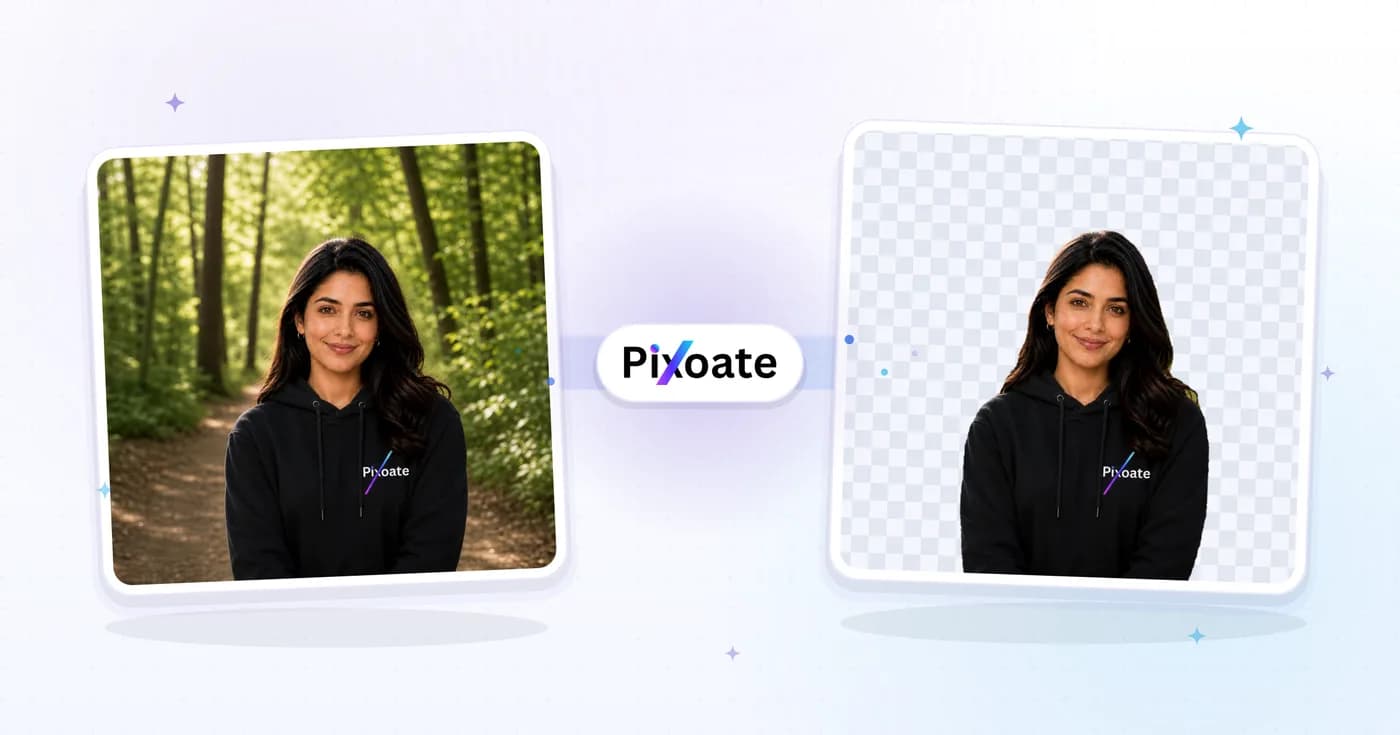
- If the subject needs separating, use background removal or the dedicated background remover for product photos.
- Add one headline, one supporting detail and a clear visual focus.
- Choose a background, illustration and colour palette that support that message.
- Save the design, then adapt the canvas for another format.
- Add restrained motion if it improves the announcement.
- Check the final dimensions, spelling and download options, then export.
For a family project, you could first colourise a black-and-white photograph, keep the original alongside the colour interpretation, and use the result in a milestone design. For a shop, preserve an accurate product photo and use the more expressive composition for promotion.
Creativity becomes easier when you can change one part without rebuilding everything else. Start with one photo and one message, then use Pixoate Photo Editor to explore the versions that make that message clearer.