
Event Stage Designer
Generative output can vary; review the full result before publishing
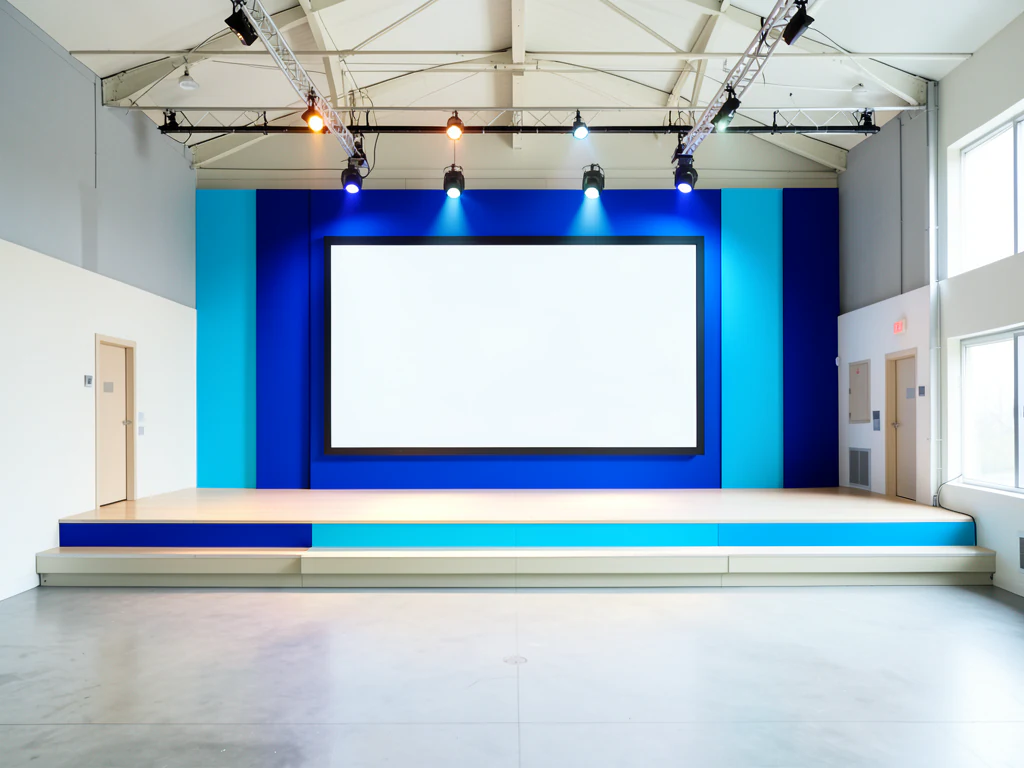
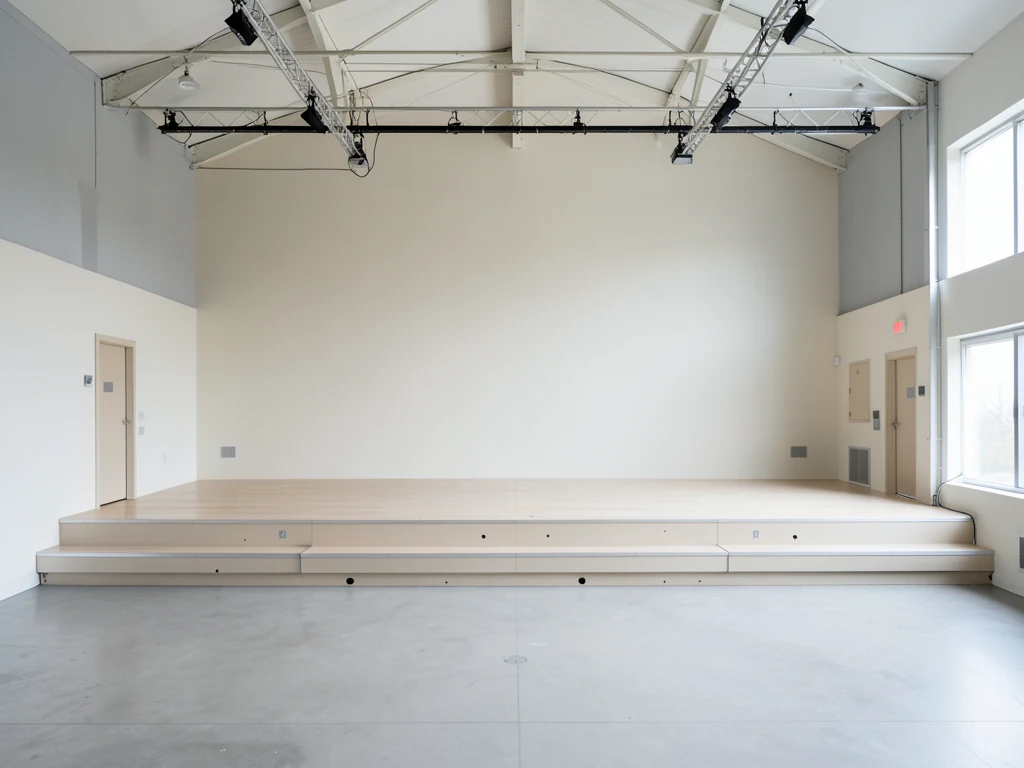
Getting internal sign-off on event staging usually means paying a designer's day rate for concept renders, waiting a week, and discovering the deck needed three directions, not one. This tool turns a photo of the actual venue into staging concepts for conferences, product launches and award nights — set, screens, lighting mood — with clean space reserved for your approved branding to be dropped in. Because the concepts sit on the real room, stakeholders approve faster and the production company you eventually brief starts from a picture of their own venue.
- Prepared Event Stage Designer direction
- Editable prompt and explicit output controls
- Full-result review required
Generative output can vary; review the full result before publishing
Choose a source image for Event Stage Designer
JPG, PNG, WebP, HEIC, and other supported formats. Free up to 20 MB; Premium and higher up to 50 MB for this tool.
Set up for Event Stage Designer
Prepared settings
- Starting point
- Upload one source image
- The page opens on the correct edit workflow; upload is the only required setup step.
- Prepared workflow
- Prepared Event Stage Designer workflow
- Event Stage Designer opens with the Event Stage Designer direction preselected, so there is no need to find the operation manually.
- Output shape
- 4:3
- The recommended composition is selected automatically and can be changed before processing.
- Review rule
- Review the complete generated result before use
- Generated imagery can vary; the final result stays under the user's approval before download.
Best-fit uses
- Concept a conference stage on the booked ballroom
- Give stakeholders three staging directions to pick
- Brief the production company with a venue visual
Frequently asked questions
- What venue photo produces the best staging concepts?
- A wide shot of the stage end of the room from the audience position, with the ceiling in frame — rigging height shapes what staging is possible, so the concept should see it. Venue sales teams will usually send you an empty-room photo on request if you have not visited yet; ask for the widest one they have.
- Are the concepts accurate enough to produce the event from?
- They are direction-setting concepts at plausible scale, not technical designs. Screen sizes, truss positions, sightlines and power are the production company's domain — brief them with the approved concept and let them engineer it against real measurements and the venue's specs. The image gets everyone to the same intent fast; the build stays with professionals.
- Can I put our company branding on the stage concepts?
- The concepts are generated with clean staging surfaces — screens, backdrops, lecterns — precisely so your own approved brand assets can be placed onto them in your design tools. That keeps brand control where it belongs: the tool never invents logos or brand marks, and your brand team applies the real ones at the right sizes.
- Whose photos can I use, and what should be checked before the deck goes out?
- Use venue photos you took or that the venue supplied for your event planning — most will happily agree, since a booked event benefits them. Review each concept fully before it enters an approval deck, and label concepts as concepts in anything shared externally, particularly sponsor-facing materials.
What you can do with AI Image Editor
Review the main capabilities before you begin.
- Expand photos into square, portrait, or landscape layouts
- Fill a painted area with newly described content
- Remove or replace selected objects in a photo
- Change skies, backgrounds, weather, or scene styling
- Stage empty rooms while retaining their architecture
- Place product photos into studio or lifestyle scenes
- Protect original pixels outside a painted local edit
Settings reference
5 settings
Available controls for AI Image Editor.
Edit
- Edit typeDropdown
- Choose the focused editing workflow so the image, prompt, optional selection, and output shape are handled consistently.Options: Text-based editGenerative fillMagic eraserObject replacerBackground changerProduct backgroundAI expandUncrop imageLandscape to portraitPortrait to landscapeSky replacementRoom stagingProduct sceneProfessional headshot
- Describe the editText input
- Describe the visual change in up to 1000 characters; object removal, replacement, and scene changes require it, while expansion can run without extra direction.
Selection
- Selection brush sizeSliderRange: 16–160px · Default: 64px
- Generative fill and object replacement require a painted area. Automatic cleanup, background, sky, and staging modes expose the same brush only through Refine area manually; pixels outside a manual selection are restored from the prepared source.
Output
- Expanded aspect ratioPresets
- Choose the new canvas shape for expand and uncrop workflows while retaining the original image inside the generated frame.Options: Square 1:1Portrait 4:5Story 9:16Wide 16:9Portrait 3:4Landscape 4:3
- Ask AI to preserve subject identity and product detailsOn / Off
- Ask the editor to retain the main subject's shape, identity, logos, labels, and readable text unless your instruction explicitly changes them.
Related tools for Event Stage Designer
Tools for common next steps after Event Stage Designer.
AI Image Studio
AI Image Generator
Generate AI images from text prompts in square, landscape, portrait, or wide formats and download the result as PNG.
Try it now
Photo Editing & Utilities
Online Photo Editor
Crop and resize photos. Add text, shapes, effects and templates, or use AI editing tools.
Try it now
Creative & Design
Add Text to Image
Add styled text with custom fonts, colors and outlines to supported image formats, then download the edited image.
Try it nowGuides for this tool
Watch each transformation land
Every photo crosses the slash untouched and comes out the other side finished.























