How to Make Your Rightmove Listing Stand Out With Better Property Photos
Use Rightmove's stated image guidance, choose the lead photo, fix common photo problems and label digital staging clearly before the listing goes live.
Written by the Pixoate team. We check how each tool behaves before we describe it, and we date any prices or portal rules we quote.
To make a Rightmove listing stand out, give your agent level, bright photos in landscape, lead with the strongest image, keep the order logical and label any digital staging clearly.
On Rightmove, most buyers meet your property through a thumbnail and a gallery on a phone. The first photo decides whether they open the listing, and the quality and order of the rest decide whether they book a viewing. In the UK, listings are usually uploaded by the estate agent, so your influence is through the photos you provide and what you ask your agent to use.
This guide was last checked in November 2026. It covers the technical points Rightmove states in its help pages, practical photo habits for UK homes and how to treat digital edits and virtual staging honestly. Rightmove's help pages did not set out rules for edited or virtually staged photos in the material we could read, so we flag where you should confirm with your agent.
The quick version
- Ask your agent which photos they will upload and in what order.
- Lead with the strongest exterior or main reception room.
- Provide level, bright, uncluttered photos in landscape.
- Keep edits honest and label any staging.
- Check the gallery on a phone once it is live.
What Rightmove says about images
Rightmove's help page for agents on uploaded images says:
- Images should be uploaded in a 3:2 ratio so they fill the space given to them.
- The help page describes a maximum accepted image dimension and an enlarge link for larger images. Check the current figure there instead of relying on a number from memory.
- Rightmove does not set a limit on the number of images per listing, but data feeds or agent software may have restrictions of their own, and some feeds cap file size per image.
The page is dated October 2026 at the time of writing, and requirements can change, so confirm with your agent, who will know what their software supports. Rightmove also publishes technical guidelines for listings that agents are expected to follow.
Choose the lead photo
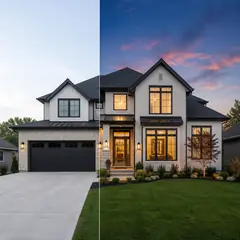
The first image appears on search results. Use the best exterior in good light, or the main living space if the front is plain. Avoid dark rooms, bins in the foreground and photos taken at dusk with poor light unless the lighting is deliberate.
Photographing common UK property types
Different homes need different approaches. A terraced house has narrow rooms and a long layout, so photographing from the corner of each room and including the through-view from front to back helps buyers understand the flow. A flat in a converted building may have high ceilings and large windows, so keep the camera level and let the light in. A bungalow has a spread-out layout, so a simple plan and clear room labels help. Period homes often have distinctive features such as fireplaces, cornices and bay windows, so include a close detail of those, since they are part of the appeal.
New-build homes are usually bright but can look anonymous, so show the garden, the layout and any storage, since buyers in that market ask about practicalities. Whatever the property, use daylight, switch the lights on and keep the exterior shot clear of cars and bins.
Photograph a UK home well
- Open every curtain and blind, and turn on all lights. Rooms with limited daylight benefit from warm lamps.
- Stand in a corner, keep the camera level at about chest height and avoid extreme wide-angle settings.
- Clear worktops, bathroom surfaces and floors, and put away bins, laundry and cables.
- Photograph bedrooms with beds made and clear floor space.
- Include the garden, parking and any outbuildings in good weather.
See real estate photography mistakes that turn buyers away for the common errors.
Fix photo problems carefully
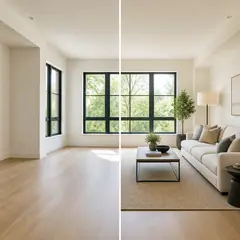
- Dark rooms: improve light and presentation with the real estate photo editor, keeping the result realistic.
- Clutter: Declutter Room AI removes temporary items from the photo.
- Grey skies: a disclosed Day to Dusk concept can make an exterior feel warmer.
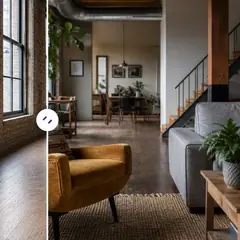
- Empty rooms: Virtual Staging AI creates a furnished concept so buyers can judge scale.
Never remove permanent features, power lines, damp or neighboring buildings, and never change a room's size.
Digital staging in the UK
We did not find official guidance written specifically for virtually staged or AI-edited property photos on Rightmove or from UK regulators in the pages we could read. The principle is simple: photos must not mislead buyers. Keep the original photo, label staged images clearly and ask your agent what Rightmove and their own policy require. Staging costs are covered in how much home staging costs in the UK.
Work with your agent
Because the agent controls the upload, make their job easy. Send photos in landscape, with clear file names such as "kitchen" or "main-bedroom", and tell them which image you want first. Ask whether they will use your photos, a photographer's or both, and whether they plan to add a floorplan and any staged images. If you have both a plain and a digitally staged version of a room, tell them which is which, so the right labels go with the right photos. A short list of what you want avoids back-and-forth after the listing is live.
What to do if the photos arrive late or look wrong
Sometimes a listing goes live with a photo you did not choose, in an order that does not suit, or with an image that looks dark on a phone. Contact your agent quickly. Explain exactly which photo and what should change, and offer the replacement. Agents can usually update images, but they need clear instructions and files in a usable format.
If you notice something that could mislead buyers, such as a staged image without a label, raise it straight away. It is easier to fix at the start of a campaign than after viewings have been booked. A few minutes of attention at that stage protects the whole listing.
Preparing a UK property room by room
A short checklist for each room keeps preparation focused. In the living room, clear the surfaces, plump the cushions and make sure the fireplace or focal point is tidy. In the kitchen, clear the worktops except for one or two items, wipe appliances and put away tea towels and bins. In the bathroom, close the toilet lid, hang fresh towels and clear toiletries from the bath and basin. In bedrooms, make the beds, remove clutter from bedside tables and keep wardrobe doors closed.
Outside, tidy the front garden, put bins out of view, clear the path and make sure the front door and windows look clean. In winter, shoot while there is still daylight and switch on lamps for warmth. In summer, open doors to garden and patio areas. Preparing every room the same way keeps the gallery consistent, and it gives your agent a set of images they can use with confidence.
Check the listing live
Once it is published, open the listing on a phone and scroll through it. Check the first photo, the order, orientation and whether any image looks dark or distorted. Ask your agent to replace weak images.
Writing and photos should tell the same story
Photos and description work together, and mismatches cause trouble. If the description promises a spacious kitchen-diner, the gallery should show it clearly, ideally from an angle that shows the layout. If a feature such as a south-facing garden is a selling point, include a photo that lets buyers see it. If a room is small, say so honestly in the text and show it accurately in the photo, because buyers who feel prepared are less likely to feel disappointed.
Read the description with the photos open beside it and tick off every claim: bedrooms, reception rooms, outdoor space, parking, views, condition. Add or reorder photos until each claim has evidence. Ask your agent to correct anything that is not backed by the images. Consistency between words and pictures builds trust, and trust is what turns browsing into booked viewings.
Related guides
For the wider picture, see our guide to real estate listing photos.
Frequently asked questions
What shape should Rightmove photos be?
Rightmove's help page for agents says to upload images in a 3:2 ratio so they fill the space they are given. That is the proportion of a typical landscape photo from a camera or phone, so shoot in landscape and avoid cropping into square or portrait shapes.
How many photos can a Rightmove listing have?
Rightmove says it does not limit the number of images per listing, but agent software or data feeds may have their own limits, and some feeds restrict file size per image. Ask your estate agent what their system allows before you decide how many photos to supply.
Can I use virtually staged photos on Rightmove?
We found no specific official Rightmove or UK regulator statement on virtually staged or AI-edited photos in the pages we read. Label staged images clearly, keep the originals so buyers can see the real room, and confirm with your estate agent what the portal and their own policy require.
Who uploads the photos to Rightmove?
Usually your estate agent, through their software. Send them landscape photos in a clear order with simple file names such as "kitchen", tell them which image should lead, and ask what formats and sizes their system needs, since they know what it accepts.
Sources and last check
Prices and rules in this guide were last checked in November 2026. This is general information, not legal or financial advice.
- Rightmove: I need help with my uploaded property images, page modified October 2026: image ratio, size handling and the absence of a Rightmove photo limit.
- Rightmove: Technical guidelines and data quality requirements, modified August 2026: Rightmove's technical guidelines for agents.
We did not find an official Rightmove or UK regulator statement specifically about virtually staged or AI-edited photos.