10 Real Estate Photography Mistakes That Turn Buyers Away and How to Fix Them
Ten listing photo mistakes, from clutter to distortion, with practical fixes and a clear line between fair editing and misleading buyers.
Written by the Pixoate team. We check how each tool behaves before we describe it, and we date any prices or portal rules we quote.
Most buyers form an opinion of a home from its photos before they ever visit. A handful of avoidable mistakes can make a good property look unappealing, and most of them are about preparation and technique rather than equipment. The good news is that they are easy to fix once you know them.
This guide lists the most common listing photo mistakes, why each one costs attention, and how to correct it, with a note on which edits are fair and which are not.
The ten mistakes at a glance
- Prepare the home before you photograph it.
- Keep the camera level, bright and at a natural height.
- Avoid distortion, glare and dark corners.
- Make careful, honest edits.
- Disclose digital changes and keep originals.
Mistake 1: Shooting a cluttered home
Cables, bins, toiletries, laundry and piles of paper pull attention away from the room. Clear surfaces and put personal items away. For temporary leftovers you cannot remove in person, Declutter Room AI removes loose items from the photo, but use it only for temporary items, not for permanent features.
Mistake 2: Dark rooms
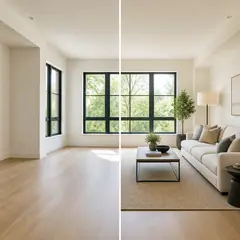
A dim photo suggests a dim home. Open all curtains, turn on every light and shoot when the room is brightest. If an image is still dark, the real estate photo editor can improve light and presentation while preserving the property. Keep the result realistic.
Mistake 3: Tilted walls and wrong height
A camera angled up or down makes walls lean and rooms feel odd. Keep the camera level, at about chest height, and stand in a corner so the room fits in the frame.
Mistake 4: Extreme wide-angle distortion
Very wide settings make rooms look larger than they are and stretch objects near the edges. Buyers notice when a room feels smaller in person. Use a moderate width and let the room look like itself.
Mistake 5: Using flash or mixed lighting
Flash creates harsh reflections and flat walls. Mixed warm and cool lights tint the room. Turn off the flash, use daylight and warm lamps consistently.
Mistake 6: Dull or grey exteriors
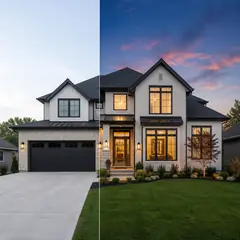
A flat grey front shot is a weak first impression. Photograph the exterior in good light, and consider a clearly disclosed Day to Dusk concept for an inviting evening look, while keeping the original.
Mistake 7: Showing empty rooms with no context
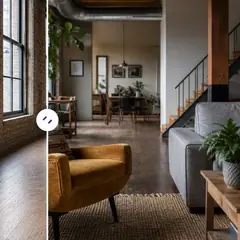
Bare rooms are hard to judge. If a space is empty, a disclosed furnished concept can help buyers see scale and use. Virtual Staging AI creates one from your photo. See how to sell an empty house without buying furniture for the full workflow.
Mistake 8: Photos in a confusing order
Buyers read a listing like a walk-through. Start with the strongest exterior or living space, then follow the path through the home. A random order makes the layout hard to understand.
Mistake 9: Hiding or editing away real problems
Removing a power line, hiding damp or changing a view can lead to disputes and lost trust. Show the property as it is, with the best light and tidiest presentation, and fix real problems where possible instead of editing them out.
Mistake 10: Not checking photos on a phone
Most buyers browse on phones. A photo that looks good on a big monitor may look dark or crowded on a small screen. Check every image on a phone before you publish.
Which mistakes cost the most
Not all mistakes are equal. In practice, a handful do most of the damage. Dark rooms and clutter come first, because they are the easiest for a buyer to notice and the hardest to forgive. Tilted walls and distortion come next, since they make a home feel unfamiliar. Hiding real problems comes last in frequency but first in consequences, because it damages trust once a buyer discovers it.
If you only have time to fix two things before a photographer arrives, fix the clutter and the light. Clear surfaces and open blinds cost nothing and improve every photo in the gallery. Everything else can be corrected in smaller steps.
Where to draw the line on editing
Reasonable edits improve presentation:
- Brightening a dim room.
- Straightening a slightly tilted shot.
- Removing temporary clutter.
- Adding a disclosed staging concept.
Edits that change what the property is mislead buyers:
- Removing permanent fixtures, damage or neighboring buildings.
- Changing room size, ceiling height or the view.
- Adding fittings or furniture that are not included, without disclosure.
Check the rules of your listing service and brokerage, label digitally changed images and keep the originals.
A before-and-after thought experiment
Imagine two listings for the same flat. In the first, the living room photo is taken from the doorway with the flash on, the sofa is covered with a throw and laundry, and the window is dark because the camera exposed for the room. In the second, the photo is taken from the corner with the camera level, the throw is folded, the blinds are open and all lights are on.
The flat is identical. A buyer scrolling quickly will judge the first as small and neglected and the second as bright and cared for. The difference cost nothing but ten minutes of preparation and a better camera position, which is why preparation, not equipment, is the heart of good listing photography.
A checklist for a photographer or helper
If someone else is taking the photos, a clear list makes the day smoother. Before they arrive, finish cleaning, decluttering and repairs. On the day, open blinds, switch on lights and unlock doors. Ask for level, bright images shot from corners at chest height, and a mix of wide and detail shots. Specify the rooms and outdoor areas that must be included, and mention any features that sell the property, such as a view or a restored fireplace.
Ask how and when the files will be delivered, in what format, and whether the originals will be provided alongside edited versions. If virtual staging or other edits are planned, say so in advance and agree on labels. A short list shared before the shoot prevents misunderstandings, and it makes the final gallery match what you actually wanted.
Reviewing the delivered photos
When the photos arrive, take twenty minutes to review them properly. Go through them in the order buyers will see them. Look at the first photo and ask whether it makes you want to click. Zoom into each room for stray objects, reflections of the photographer, crooked lines and dark corners. Check that colors look natural, and that walls and floors have not been brightened until they look unreal.
Note what you would like changed, and ask for it in one clear message. Make sure there are no images that show private information, such as documents, family photos or house numbers you would rather not share. A calm, careful review at this stage is quick, and it protects the listing from the small errors that buyers notice instantly.
What to do when you cannot reshoot
Sometimes the photos already exist and reshooting is not possible, perhaps because the home is tenanted or has already been sold on the market once. In that case, work with what you have. Choose the best images and drop the weakest rather than including everything, since a smaller set of good photos beats a large set with several poor ones. Brighten dark images modestly, straighten tilted ones and remove temporary clutter, keeping everything honest.
If a key room has no good photo, add a short description to make up for it, and offer to share extra images on request. Plan to improve the set when circumstances allow, for example when tenants move out or the season changes. A thoughtful edit of existing photos can lift a listing considerably, and it also shows buyers that you care about presenting the home properly.
Related guides
For a fuller workflow, read how to make property listing photos look professional. For short-stay listings, see how to make Airbnb listing photos stand out.
Frequently asked questions
How many photos should a listing have?
Enough to show every main space and feature. Check your listing service's limits and aim for clear images of each room.
Is it fine to brighten photos?
Yes, as long as the room still looks like it does in person. Avoid edits that make it look larger, newer or lighter than it is.
Do I need to disclose virtual staging?
Be transparent. Label staged images and keep the originals. Rules vary, so confirm what applies in your market.
What is the biggest single improvement?
Preparation: a clean, tidy, well-lit home photographed level and in daylight.
Most of these mistakes are fixed with preparation, not software. For the weakest photo that remains, the real estate photo editor can improve light and presentation without changing the property.