How to Make Your Airbnb Listing Photos Stand Out Without a Photographer
Prepare, shoot and fix short-stay listing photos, from dark rooms to clutter, and use staging or dusk edits without misleading future guests.
Written by the Pixoate team. We check how each tool behaves before we describe it, and we date any prices or portal rules we quote.
A guest scrolling through short-stay listings decides in seconds. They cannot smell the fresh linen or feel the sun on the balcony; they have your photos. A dark bedroom, a cluttered kitchen or a crooked bathroom shot makes a good property look ordinary, and a guest moves on to the next listing.
Good photos do not need a photographer. This guide covers what to shoot, how to fix common problems, and how to stay honest about what guests will find.
In brief
- Clean and style the property for the camera, not just for guests.
- Shoot every room in daylight, with all lights on, from a corner at chest height.
- Fix dark, tilted or cluttered images before upload.
- Use virtual staging only where it helps, and label it.
- Check every image against the real property.
Decide what the first photo has to say
Your first photo is the thumbnail. It should show the best thing about the stay: the living area with a view, a bright bedroom, a pool or a terrace. Pick the space guests will care about most, then make sure the second to fifth photos answer the questions that follow: where will I sleep, where will I cook, where will I wash?
Prepare the space for the camera
- Remove personal items, loose cables, bins and cleaning products.
- Make beds tightly, fold towels and straighten cushions.
- Open curtains and blinds, and switch on lamps even in daylight.
- Add one or two simple touches per room, such as a plant or a bowl of fruit.
- Check mirrors and windows for smudges.
How to shoot each room
- Stand in a doorway or a corner and keep the camera level, so vertical lines stay vertical.
- Take one wide view per room and a few close details: the coffee station, the view, the bath.
- Avoid extreme wide-angle settings that stretch the room and make it look larger than it is.
- Shoot in the brightest part of the day without direct sun through the window.
- Photograph the same space from two angles if one is awkward.
Fix the problems that cost bookings
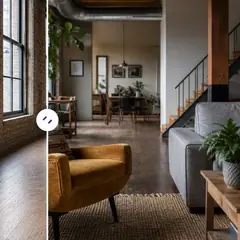
Dark rooms. A dim photo suggests a dim property. Use the real estate photo editor to improve light and presentation while keeping the room truthful. Brighten it to match what guests see on a good day, not an unrealistic glow.
Clutter. If a stray item is in shot, remove it from the photo with Declutter Room AI and then check the surface behind it looks natural.
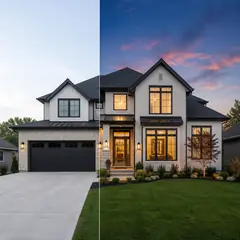
Dull exteriors. A flat grey front of the building can look unwelcoming. The Day to Dusk tool creates a dusk concept, which you should disclose, and it is intended to leave the property itself unchanged, which can suit a warm evening image of a terrace or entrance.
What a guest actually needs from each photo
It helps to imagine the questions a guest asks while scrolling. Is it clean? Is it bright? Is there somewhere comfortable to sit, a proper bed, a kitchen I can use, a bathroom I would not mind sharing with my family? Is it what the title says?
Good short-stay photos answer those questions without needing the description. A bedroom photo should show the real bed size, the bedside space and where the light comes from. A kitchen photo should show the equipment that is actually there, so a guest who plans to cook can judge whether the pans and hob are enough. A bathroom photo should show whether it has a bath or a shower and how big it is. A living area should show seating that fits the number of guests the listing says it sleeps.
If a photo does not answer one of those questions, ask whether it is earning its place in the gallery.
Use virtual staging carefully
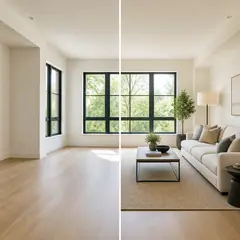
An empty or sparsely furnished space can be hard for guests to read. Airbnb Virtual Staging creates a staging concept and is intended to keep fixed architecture and actual amenities unchanged. Whatever it produces, this is the rule to follow: do not add furniture, features or facilities that guests will not find. A sofa bed shown in a photo should be in the property, and a view shown in a photo should be the real view.
Check every image against reality
Before you upload:
- Compare the photo with the room. Windows, doors, ceilings and fixed features must match.
- Make sure the bed size, the number of beds and the kitchen equipment shown are accurate.
- Do not hide wear, marks or noise sources that a guest would notice.
- Check the platform's current photo guidelines and local rules, because requirements vary.
- Keep your unedited photos so you can redo a change.
A room-by-room shot list
Walking through a short-stay property with a list stops you forgetting the shots guests care about. In the living area, take a wide view that shows the seating and where people will gather, a view toward the window or outdoor space, and a detail such as a games shelf or a reading corner. In the kitchen, show the full layout, the hob and oven, the coffee machine or kettle, and a shot of the storage so guests can see whether there are proper pans and plates.
In each bedroom, photograph the bed from the foot with the bedside tables in view, and show wardrobe or storage space. In the bathroom, show the shower or bath, the basin and a clear view of cleanliness. Outside, show the entrance, the terrace or balcony, parking and any view. Add one or two photos that show the neighborhood or the nearest attraction if they are close enough to matter. A complete set lets guests build a picture of the stay without needing to ask.
Order the photos like a story
- Best space or view.
- Main living area.
- Main bedroom.
- Kitchen.
- Bathroom.
- Other bedrooms and extras.
- Exterior and surroundings.
Add short captions where the platform allows them, for example "Fully equipped kitchen" or "Terrace with evening sun."
Seasons, light and returning guests
Short-stay listings have a particular advantage: you can refresh photos as the seasons change. A terrace photographed on a warm evening with soft light feels different from the same terrace in a grey week. Keep a few seasonal images ready, and update the first photo when your best feature changes, such as a garden in bloom or a cozy fire in winter.
Returning guests and reviews matter too. If a review mentions something that your photos did not show, such as a lovely view or the quiet courtyard, add it to the gallery. Guests who read reviews and then see the same detail in a photo trust the listing more. And if a review says a room was smaller or darker than the photos suggested, treat that as useful feedback and retake the photo more honestly.
Complaints your photos can prevent
Guest reviews are a useful map of where photos set the wrong expectations. Complaints about a room being smaller than it looked usually come from extreme wide-angle shots, so use a more modest width. Complaints about darkness come from photos that were brightened far beyond what the room delivers on an ordinary day. Complaints about noise or views come from images that framed the one pleasant direction and ignored the other.
When you read reviews, treat every comment about expectations as a prompt to adjust the gallery. If guests keep praising the quiet courtyard, give it a photo. If they keep mentioning a steep staircase, say so in the description rather than hoping the images imply otherwise. Listings that describe themselves accurately tend to attract guests who are happy to be there, and happy guests leave the reviews that bring in the next booking.
Related guides
If you are also preparing a property for sale, see how to sell an empty house without buying furniture. For a dark or soft image that needs a rescue, read how to fix a blurry photo. For the wider picture, see our guide to real estate listing photos.
Frequently asked questions
How many photos should an Airbnb listing have?
Use enough to show every room and the main features, with each photo answering a question a guest might have. Check the platform's current requirements for minimums and limits.
Can I use AI staging on a short-stay listing?
You can, as long as it does not misrepresent what guests will find. Do not add furniture or features that are not part of the stay, and label staged images where the platform expects it.
Is it fine to brighten dark photos?
Yes, if the result looks like the room on a good day. Avoid heavy edits that make the room look larger, newer or lighter than it is.
Should I use a wide-angle lens?
A little width helps small rooms, but extreme settings distort proportions and can lead to guests feeling misled on arrival.
Guests forgive a modest property far more readily than a misleading photo. If one room looks darker than it feels, the real estate photo editor can lift it without changing what guests will find.