
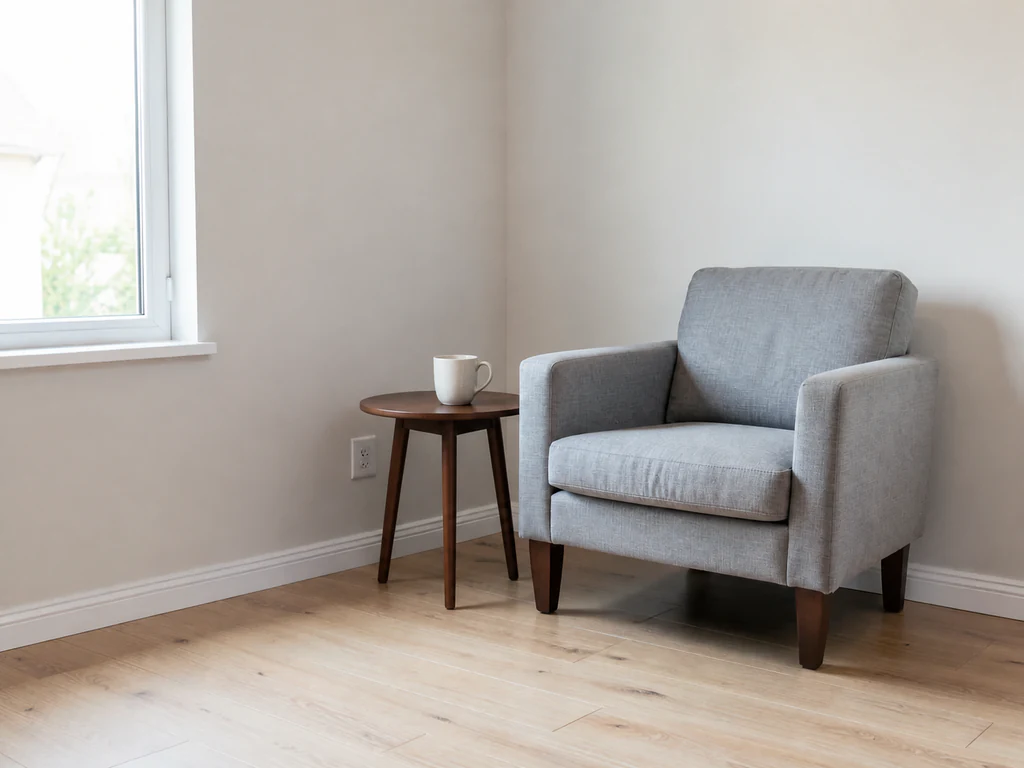

Add Object to Photo with AI — Insert Objects Online
Paint enough space for the object and its contact shadow
Mark where the new object should go and describe it. Give it room to fit naturally, or use Exact painted area for precise placement. Surroundings are restored from the prepared source.
- Mark a placement or paint exact boundaries
- Match scene lighting, scale, and perspective
- Preserve surroundings outside the final edit area
Paint enough space for the object and its contact shadow
Choose the photo you want to add to
JPG, PNG, WebP, HEIC, and other supported formats. Free up to 20 MB; Premium and higher up to 50 MB for this tool.
How to add an object to a photo with AI
Adding an object to a photo with AI starts with marking where it should go and describing what it is. A plant in an empty corner, a chair beside a table, a lamp on a shelf or a person in a doorway can be generated to match the perspective, scale and light of the scene, with a contact shadow. Everything outside the edit area is restored from your upload, so the rest of the photo stays yours to compare against.
Add a plant, furniture or decor to a photo
Paint the spot where the new item should stand, leaving room for the object and its contact shadow, then answer What should appear in the selection? The Presets tab offers Add a plant, Add furniture, Add a person and Add décor, and each one writes a sentence that you can edit. Name the item, its style and its color, for example a tall fiddle-leaf fig in a white pot, so the tool has something specific to draw.
- Upload an opaque photo in which the empty spot is visible.
- Paint where the object should go, with a little room for its shadow.
- Choose a preset, or describe the object in the box.
- Select Generate to place the object.
- Check the object and its shadow, then download the PNG.
Place the object where it belongs
A rough mark lets the edit area grow so that the object appears complete with its shadow, which suits most additions. Switch on Exact painted area when the object must fit a defined gap, such as the space between 2 shelves. Paint on the floor or surface where the object would physically stand: a mark floating in mid-air gives the tool no contact point for a believable shadow.
Match scale, perspective and light
The tool reads perspective and lighting from the surrounding scene, and you steer scale through how much space you mark and how you describe the item. A mark that is too small squeezes the object, while one that is too large invites extras. Keep the description to one object. If the first result looks pasted in, generate again with a clearer size and position, such as a floor lamp about as tall as the door frame.
Add, replace or restage: which page
If something already stands in the spot, clear it first. To swap an existing item rather than add one, replace an object with something else. To furnish a whole empty room in one go, stage the room automatically. When you need an exact logo or product picture rather than a generated object, place your own picture on top.
Before you download the new object
- Check how the object meets the floor or surface, and whether its shadow follows the other shadows.
- Look at scale next to doors, tables and people in the scene.
- Batch images is not offered here, because every photo needs its own placement.
Placing an object and checking the scene
If something already occupies the spot, clear the clutter there first; for an entire empty room instead of one item, stage the whole space for a listing.
Adding and removing can happen in one workspace with an editor that has 16 edit types, and a before-and-after view shows whether the new object's scale looks right.
What you can do with Add Object to Photo with AI
Review the main capabilities before you begin.
- Add plants, furniture, people, and décor to photos
- Choose a placement with a rough mark or exact selection
- Match object scale, perspective, lighting, and shadows
- Restore unedited surroundings from the prepared source
Settings reference
4 settings
Available controls for Add Object to Photo with AI.
Presets
- One-tap presetsPresets
- Pick a ready-made direction with one tap; generation uses the selected preset automatically.Options: Add a plantAdd furnitureAdd a personAdd décor
- What should appear in the selection?Text input
- Describe the requested change, relevant materials, lighting, perspective, and details that must remain unchanged.
Selection
- Selection brush sizeSliderRange: 4–160px · Default: 32px
- Set the brush width used to mark the exact add, fill, or replacement area required before generation.
Output
- Ask AI to preserve subject identity and product detailsOn / Off
- Adds an explicit instruction to retain the main subject, shape, branding, labels, and readable text unless the request changes them.
Related tools for Add Object to Photo with AI
Tools for common next steps after Add Object to Photo with AI.
AI Image Studio
AI Generative Fill
Paint part of an image and fill it with new AI-generated content. Repair gaps, add details, or replace selected areas while protecting nearby pixels.
Try it now
AI Image Studio
AI Object Replacer
Select and replace an object in a photo with AI. Swap furniture, products, plants, décor, and more while keeping surrounding pixels protected.
Try it now
Virtual Staging & Property
AI Room Staging
Stage empty or dated rooms with AI furniture and décor. Create living rooms, bedrooms, offices, dining rooms, and interior style concepts.
Try it nowFrequently Asked Questions
Watch each transformation land
Every photo crosses the slash untouched and comes out the other side finished.























