Craft and repair demonstrations
Reframe a short step from an existing tutorial. Keep the tool, hands, and object together so the vertical crop still explains the task.
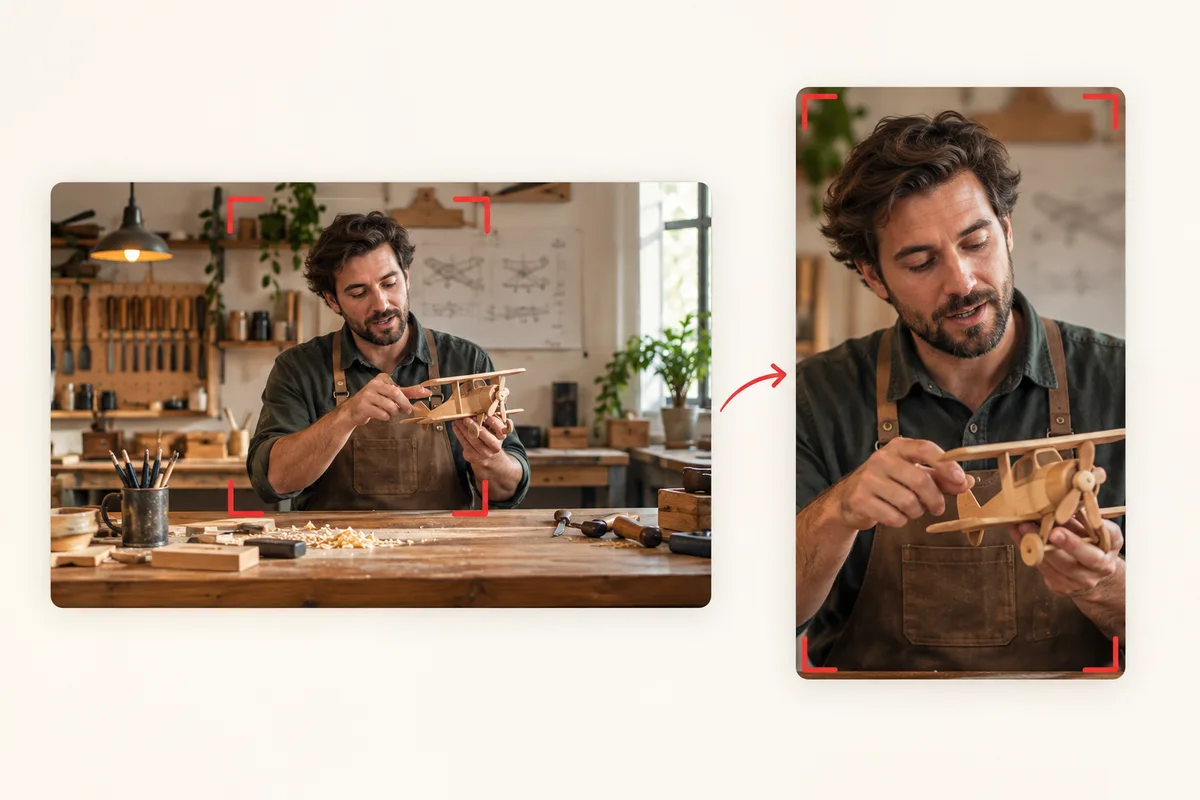
1080 × 1920 · 9:16 · Crop to frame
Reframe an edited tutorial or highlight as a vertical YouTube Short. Start at 1080 × 1920, keep the important action in view, and download your MP4.
1080 × 1920 · 9:16 · Crop to frame
MP4, MOV, WebM · Trim before exporting · Checking your upload limit…
Files are uploaded for conversion. Your upload is removed as soon as it is converted, and converted videos are automatically deleted within 24 hours.
Upload your video and use Trim to select the segment for your Short. You choose the start and end times; the converter does not automatically select highlights or split a full episode into separate clips.
Start with the 9:16 crop and position it around the main action. A tutorial may need hands and materials in view, while a commentary clip may need the speaker and a visual aid together.
If a crop hides a screen recording, diagram, or second speaker, choose Keep whole video and a blur background. Wide text will appear smaller on a tall canvas, so check readability on a phone.
Download the MP4 and upload it through YouTube. Resizing does not add captions, select music, or change the length. YouTube determines how an upload is categorized and displayed.
Reframe a short step from an existing tutorial. Keep the tool, hands, and object together so the vertical crop still explains the task.
Bring a short gameplay moment into a vertical canvas. Use a full-frame layout if the score, map, or subtitles at the edges are necessary to understand it.
Prepare an edited lesson excerpt for vertical viewing. Use the preview to assess whether a diagram remains readable after reframing.
This page starts with 9:16 at 1080 × 1920. YouTube also categorizes eligible square uploads as Shorts. The platform makes that decision based on the upload, its dimensions, and duration.
You can upload a local MP4, MOV, or WebM video, choose start and end times in Trim, and resize that segment. It does not automatically find highlights, split an episode into multiple clips, or download videos from YouTube. Check the selected length against YouTube’s Shorts requirements before publishing.
Use Keep whole video to retain all of the original frame. Because a wide frame becomes smaller inside a vertical canvas, preview the text at phone size. A tighter crop may improve readability but can remove other details.
Yes, an audio track is retained unless you choose Mute audio. The export re-encodes audio as AAC. Music availability and any content claims are handled by YouTube when you upload.
YouTube explains how eligible square or vertical videos up to three minutes are categorized as Shorts. YouTube guidance on three-minute Shorts
Explore every ratio in the portrait and landscape video converter, or resize a still image with the landscape to portrait photo converter.
Review the main capabilities before you begin.
Available controls for Portrait & Landscape Video Converter.
Tools for common next steps after Portrait & Landscape Video Converter.
Photo Editing & Utilities
Convert landscape to portrait or portrait to landscape with fast background fills or AI-generated scenery, without cropping the original photo.
Try it nowPhoto Editing & Utilities
Resize an image to exact dimensions or by percentage. Preview and download the result.
Try it nowPhoto Editing & Utilities
Drag to crop an image. Choose a preset ratio or enter exact dimensions.
Try it nowEvery photo crosses the slash untouched and comes out the other side finished.