
Empty Room Converter
Generative output can vary; review the full result before publishing
A spare room stays empty for years because nobody can agree what it should become — a playroom, a nursery, a home office, a gym, a pooja room. This converter takes a photo of the actual room and shows it furnished for each purpose, with the walls, windows and light you really have preserved, so the household debates a picture of its own space instead of an argument in the abstract, and the money gets spent once, on the version everyone has already seen.
- Prepared Empty Room Converter direction
- Editable prompt and explicit output controls
- Full-result review required
Generative output can vary; review the full result before publishing
Choose a source image for Empty Room Converter
JPG, PNG, WebP, HEIC, and other supported formats. Free up to 20 MB; Premium and higher up to 50 MB for this tool.
Set up for Empty Room Converter
Prepared settings
- Starting point
- Upload one source image
- The page opens on the correct edit workflow; upload is the only required setup step.
- Prepared workflow
- Prepared Empty Room Converter staging direction
- Empty Room Converter opens with the Empty Room Converter direction preselected, so there is no need to find the operation manually.
- Output shape
- 4:3
- The recommended composition is selected automatically and can be changed before processing.
- Review rule
- Review the complete generated result before use
- Generated imagery can vary; the final result stays under the user's approval before download.
Best-fit uses
- Settle playroom versus office versus gym for one room
- Show a partner the nursery before buying anything
- Preview a pooja room in the corner it would occupy
Frequently asked questions
- How does it work, and what should I upload?
- Upload one clear photo of the empty room — stand in the doorway so the frame catches the floor, at least two walls and the window. Pick the purpose you are considering and the converter furnishes that photo for it. The wider and better lit the shot, the more of the real room the concept has to work with.
- Will the furnished room match reality exactly?
- Treat it as a concept at plausible scale, not a floor plan. It keeps your room and places furnishings at sizes that look right in it, but it does not measure. Use the image to settle the direction and brief whoever helps you furnish, then confirm actual dimensions with a tape before ordering large pieces.
- Can I try several purposes on the same room photo?
- Yes, and that is the honest way to decide: run the same photo as a playroom, an office and a gym, put the results side by side, and the household usually agrees quickly. Comparing purposes on one identical photo is fairer than comparing rooms from the internet that share nothing with yours.
- Whose photos can I use, and should I check the result?
- Use photos you took or have the rights to use — your own home, or a space whose owner has agreed. Review the full image before sharing it, especially anything reconstructed near edges and corners. If a converted room ever appears in a listing or advert, disclose that it is an edited concept where your local rules require it.
What you can do with AI Room Staging
Review the main capabilities before you begin.
- Plan complete-room furniture placement automatically
- Restyle living rooms, bedrooms, offices, and dining rooms
- Preserve fixed architecture and camera perspective
- Process property sets in Premium batch mode
Settings reference
5 settings
Available controls for AI Room Staging.
Workflow
- Single image or Batch imagesPresets
- Process one image, or use Premium Batch images to apply the same automatic recipe to a set and download one ZIP.Options: Single imageBatch images
Styles
- One-tap presetsPresets
- Pick a ready-made direction with one tap; generation uses the selected preset automatically.Options: Modern living roomScandinavianLuxury interiorHome officeBedroomDining room
- Custom instructions (optional)Text input
- Describe the requested change, relevant materials, lighting, perspective, and details that must remain unchanged.
Selection
- Selection brush sizeSliderRange: 4–160px · Default: 32px
- Automatic selection is the default. Open Refine area manually and set this brush width only when the image needs a tighter edit boundary.
Output
- Ask AI to preserve subject identity and product detailsOn / Off
- Adds an explicit instruction to retain the main subject, shape, branding, labels, and readable text unless the request changes them.
Related tools for Empty Room Converter
Tools for common next steps after Empty Room Converter.
Virtual Staging & Property
AI Real Estate Photo Editor
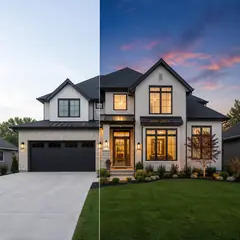
Edit real-estate photos with AI: add furniture or a TV, paint walls, remove clutter, replace skies, improve landscaping, and create twilight exteriors.
Try it now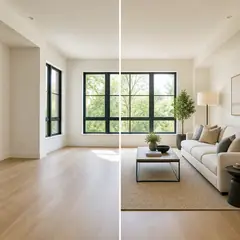
Virtual Staging & Property
Virtual Staging AI
Virtually stage empty rooms with AI furniture for real-estate listings. Create living room, bedroom, office, dining, and luxury concepts.
Try it now
Photo Enhancement
AI Photo Enhancer
Adjust noise, sharpness, color and scale in one enhancement workflow, then compare the result with the original.
Try it nowGuides for this tool
- How to Create Furnishing Proposals for Interior Design Clients with AICreate AI furnishing proposals for interior design clients with Pixoate. Compare room concepts and assemble clear presentation PDFs for discussion.
- Beautifully Staged, Believably Sized: Why Virtual Furniture Must Fit the RoomVirtual furniture needs believable proportions. Explore room-scale reviews and Pixoate comparisons that keep attractive staging concepts grounded in reality.
Watch each transformation land
Every photo crosses the slash untouched and comes out the other side finished.























