


Remove Furniture from Photo
Generative output can vary; review the full result before publishing
Heavy, dated or simply too much furniture makes a room look smaller than it is, and buyers rarely picture past it. This direction removes the movable pieces and reconstructs the floor and walls they were covering, while doors, windows, built-ins and other fixed architecture stay exactly where they are.
- Prepared Remove Furniture from Photo direction
- Editable prompt and explicit output controls
- Full-result review required
Generative output can vary; review the full result before publishing
Choose a source image for Remove Furniture from Photo
JPG, PNG, WebP, HEIC, and other supported formats. Free up to 20 MB; Premium and higher up to 50 MB for this tool.
Set up for Remove Furniture from Photo
Prepared settings
- Starting point
- Upload one source image
- The page opens on the correct edit workflow; upload is the only required setup step.
- Prepared workflow
- Prepared Remove Furniture from Photo edit direction
- Remove Furniture from Photo opens with the Remove Furniture from Photo direction preselected, so there is no need to find the operation manually.
- Output shape
- 4:3
- The recommended composition is selected automatically and can be changed before processing.
- Review rule
- Review the complete generated result before use
- Generated imagery can vary; the final result stays under the user's approval before download.
Best-fit uses
- Showing an empty room before virtual staging
- Removing a previous owner's dated furniture from listing shots
- Giving buyers a neutral space to imagine their own layout
Frequently asked questions
- Should I empty a room or restage it?
- Empty first, stage second, and the two-step order matters. Removing furniture reveals the room's real proportions and light, and staging on top of a cleared room produces a far more coherent result than trying to replace furniture in place, which usually leaves fragments of the original behind.
- What stays in the photo?
- Anything fixed: kitchen units, wardrobes that are built in, radiators, flooring, skirting, light fittings, window treatments where they are part of the sale. These form the property itself. Only movable furniture is taken out, because that is what a buyer would not be inheriting.
- Why do some removals leave strange floor patterns?
- Everything behind a removed object has to be reconstructed from what surrounds it. A patterned floor or a strongly grained wood is hard to continue convincingly under a large sofa. Where the rebuilt area looks wrong, moving the item and reshooting gives a genuinely better image.
- Do I have to disclose furniture removal on a listing?
- Treat it as an edit and follow your local rules, which increasingly require labelling. An empty-room image is honest about the space; it becomes misleading only if a buyer could think fitted items were removed too, so keep fixed features visibly intact.
What you can do with AI Real Estate Photo Editor
Review the main capabilities before you begin.
- Stage complete rooms automatically for disclosed concepts
- Add selected TVs, wall colors, or landscaping precisely
- Remove described cables, bins, signs, and distracting clutter
- Replace skies and create realistic twilight exteriors
- Refine automatic edit areas manually when needed
Settings reference
5 settings
Available controls for AI Real Estate Photo Editor.
Tasks
- Edit typeDropdown
- Choose the edit to perform; prompts, selection tools and output controls follow the selected edit type.Options: Text-based editGenerative fillMagic eraserSky replacementRoom staging
- One-tap presetsPresets
- Pick a ready-made direction with one tap; generation uses the selected preset automatically.Options: Add furnitureAdd TVPaint walls warm whiteTwilight skyReplace skyRemove clutterRefresh landscaping
- Custom instructions (optional)Text input
- Describe the requested change, relevant materials, lighting, perspective, and details that must remain unchanged.
Selection
- Selection brush sizeSliderRange: 4–160px · Default: 32px
- Set the brush width used to mark the exact add, fill, or replacement area required before generation.
Output
- Ask AI to preserve subject identity and product detailsOn / Off
- Adds an explicit instruction to retain the main subject, shape, branding, labels, and readable text unless the request changes them.
Related tools for Remove Furniture from Photo
Tools for common next steps after Remove Furniture from Photo.
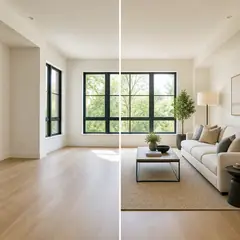
Virtual Staging & Property
Virtual Staging AI
Virtually stage empty rooms with AI furniture for real-estate listings. Create living room, bedroom, office, dining, and luxury concepts.
Try it now
Virtual Staging & Property
AI Room Staging
Stage empty or dated rooms with AI furniture and décor. Create living rooms, bedrooms, offices, dining rooms, and interior style concepts.
Try it now
Photo Enhancement
AI Photo Enhancer
Adjust noise, sharpness, color and scale in one enhancement workflow, then compare the result with the original.
Try it nowGuides for this tool
- How to Prepare Real Estate Listing Photos in Bulk for an AgencyOrganize bulk real estate photo editing with Pixoate. Keep properties, room sequences and concept images clear across an agency's listing workflow.
- How to Remove Temporary Clutter from Real Estate Photos with AIRemove temporary clutter from real estate photos with Pixoate. Review cables and stray objects while preserving the property's actual condition.
Watch each transformation land
Every photo crosses the slash untouched and comes out the other side finished.























