


Contractor Before and After Generator
Generative output can vary; review the full result before publishing
Homeowners commission work they cannot picture, and a contractor who can show the outcome wins the job. This direction builds a plausible after-concept from a genuine before photo for the trade in question, while keeping the property honest — including the defects the work is meant to address, which is exactly what must not quietly disappear.
- Prepared Contractor Before and After Generator direction
- Editable prompt and explicit output controls
- Full-result review required
Generative output can vary; review the full result before publishing
Choose a source image for Contractor Before and After Generator
JPG, PNG, WebP, HEIC, and other supported formats. Free up to 20 MB; Premium and higher up to 50 MB for this tool.
Set up for Contractor Before and After Generator
Prepared settings
- Starting point
- Upload one source image
- The page opens on the correct edit workflow; upload is the only required setup step.
- Prepared workflow
- Prepared Contractor Before and After Generator workflow
- Contractor Before and After Generator opens with the Contractor Before and After Generator direction preselected, so there is no need to find the operation manually.
- Output shape
- 4:3
- The recommended composition is selected automatically and can be changed before processing.
- Review rule
- Review the complete generated result before use
- Generated imagery can vary; the final result stays under the user's approval before download.
Best-fit uses
- Showing a homeowner the outcome during a quote
- Concept images for a trade's website and social channels
- Explaining the difference between two levels of specification
Frequently asked questions
- Can I use these as portfolio photos of completed work?
- No. A generated after-image is a concept, not evidence of work you have done, and presenting it as a finished job is straightforwardly deceptive — in many markets it is actionable. Label concepts clearly and keep them entirely separate from photographs of real completed projects.
- How do I show a customer what work will look like?
- Start from a real photo of their property, generate the concept for the specific work quoted, and say plainly that it is an illustration. Homeowners respond well to seeing their own house, and the honesty about it being a concept builds more trust than a polished stock photo does.
- Will it hide existing damage?
- It is built not to conceal material defects, and you should verify that on every image. A concept that quietly removes rot, cracking or damp is misleading about both the property and the scope of work — and it will be contradicted the moment the job starts.
- Should the before photo be edited too?
- Never. The before must stay an unedited photograph. The entire credibility of a before-and-after rests on the before being real — darkening or worsening it to exaggerate the difference is a well-known deceptive practice and it is easy to spot.
What you can do with AI Real Estate Photo Editor
Review the main capabilities before you begin.
- Stage complete rooms automatically for disclosed concepts
- Add selected TVs, wall colors, or landscaping precisely
- Remove described cables, bins, signs, and distracting clutter
- Replace skies and create realistic twilight exteriors
- Refine automatic edit areas manually when needed
Settings reference
5 settings
Available controls for AI Real Estate Photo Editor.
Tasks
- Edit typeDropdown
- Choose the edit to perform; prompts, selection tools and output controls follow the selected edit type.Options: Text-based editGenerative fillMagic eraserSky replacementRoom staging
- One-tap presetsPresets
- Pick a ready-made direction with one tap; generation uses the selected preset automatically.Options: Add furnitureAdd TVPaint walls warm whiteTwilight skyReplace skyRemove clutterRefresh landscaping
- Custom instructions (optional)Text input
- Describe the requested change, relevant materials, lighting, perspective, and details that must remain unchanged.
Selection
- Selection brush sizeSliderRange: 4–160px · Default: 32px
- Set the brush width used to mark the exact add, fill, or replacement area required before generation.
Output
- Ask AI to preserve subject identity and product detailsOn / Off
- Adds an explicit instruction to retain the main subject, shape, branding, labels, and readable text unless the request changes them.
Related tools for Contractor Before and After Generator
Tools for common next steps after Contractor Before and After Generator.
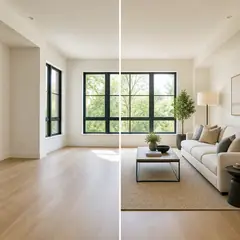
Virtual Staging & Property
Virtual Staging AI
Virtually stage empty rooms with AI furniture for real-estate listings. Create living room, bedroom, office, dining, and luxury concepts.
Try it now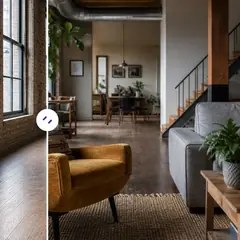
Virtual Staging & Property
AI Room Staging
Stage empty or dated rooms with AI furniture and décor. Create living rooms, bedrooms, offices, dining rooms, and interior style concepts.
Try it now
Photo Enhancement
AI Photo Enhancer
Adjust noise, sharpness, color and scale in one enhancement workflow, then compare the result with the original.
Try it nowGuides for this tool
- How to Prepare Real Estate Listing Photos in Bulk for an AgencyOrganize bulk real estate photo editing with Pixoate. Keep properties, room sequences and concept images clear across an agency's listing workflow.
- How to Remove Temporary Clutter from Real Estate Photos with AIRemove temporary clutter from real estate photos with Pixoate. Review cables and stray objects while preserving the property's actual condition.
Watch each transformation land
Every photo crosses the slash untouched and comes out the other side finished.























