


Fence Visualizer
Generative output can vary; review the full result before publishing
Almost nobody can picture a fence from a sample board in a showroom, because the thing that decides it is how the line runs across their own yard. Upload a photo of the boundary and see the style, height and material standing where it would actually go, with the house and the neighboring properties unchanged.
- Prepared Fence Visualizer direction
- Editable prompt and explicit output controls
- Full-result review required
Generative output can vary; review the full result before publishing
Choose a source image for Fence Visualizer
JPG, PNG, WebP, HEIC, and other supported formats. Free up to 20 MB; Premium and higher up to 50 MB for this tool.
Set up for Fence Visualizer
Prepared settings
- Starting point
- Upload one source image
- The page opens on the correct edit workflow; upload is the only required setup step.
- Prepared workflow
- Prepared Fence Visualizer workflow
- Fence Visualizer opens with the Fence Visualizer direction preselected, so there is no need to find the operation manually.
- Output shape
- 4:3
- The recommended composition is selected automatically and can be changed before processing.
- Review rule
- Review the complete generated result before use
- Generated imagery can vary; the final result stays under the user's approval before download.
Best-fit uses
- Showing a homeowner two fence styles on their own boundary
- Comparing panel heights before a privacy fence is ordered
- Settling a wood-versus-vinyl decision with a picture, not a brochure
Frequently asked questions
- Can I see the fence on my own yard rather than a stock photo?
- Yes, and that is the point of it. Stand where the fence would be seen from most often, get the whole run of the boundary in frame, and upload that photo. The fence is drawn into your scene, so the house, the slope and the planting around it are the ones you actually have.
- Does it know how much fence I need?
- No. It shows what a fence would look like, not how many panels or posts the run takes. Lengths, gate positions, post spacing and ground conditions come from a measure on site, and the quote comes from that measure rather than from the picture.
- Will it get the height right?
- It follows the height you describe against the objects already in the photo, so a six-foot fence reads as roughly six feet next to a door or a person. Treat it as proportion rather than measurement, and confirm the permitted height with your local rules before ordering, since limits differ between front and rear boundaries in most places.
- Can I use the result in a quote or a proposal?
- Yes, as an illustration of the concept, and it should be labeled as one. It is a visualization rather than a survey drawing, so it does not establish the boundary line, and nothing in the image should be read as a commitment on price, materials or the final position of the fence.
What you can do with AI Real Estate Photo Editor
Review the main capabilities before you begin.
- Stage complete rooms automatically for disclosed concepts
- Add selected TVs, wall colors, or landscaping precisely
- Remove described cables, bins, signs, and distracting clutter
- Replace skies and create realistic twilight exteriors
- Refine automatic edit areas manually when needed
Settings reference
5 settings
Available controls for AI Real Estate Photo Editor.
Tasks
- Edit typeDropdown
- Choose the edit to perform; prompts, selection tools and output controls follow the selected edit type.Options: Text-based editGenerative fillMagic eraserSky replacementRoom staging
- One-tap presetsPresets
- Pick a ready-made direction with one tap; generation uses the selected preset automatically.Options: Add furnitureAdd TVPaint walls warm whiteTwilight skyReplace skyRemove clutterRefresh landscaping
- Custom instructions (optional)Text input
- Describe the requested change, relevant materials, lighting, perspective, and details that must remain unchanged.
Selection
- Selection brush sizeSliderRange: 4–160px · Default: 32px
- Set the brush width used to mark the exact add, fill, or replacement area required before generation.
Output
- Ask AI to preserve subject identity and product detailsOn / Off
- Adds an explicit instruction to retain the main subject, shape, branding, labels, and readable text unless the request changes them.
Related tools for Fence Visualizer
Tools for common next steps after Fence Visualizer.
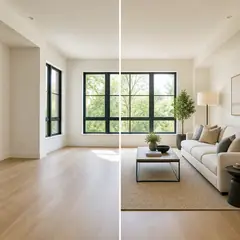
Virtual Staging & Property
Virtual Staging AI
Virtually stage empty rooms with AI furniture for real-estate listings. Create living room, bedroom, office, dining, and luxury concepts.
Try it now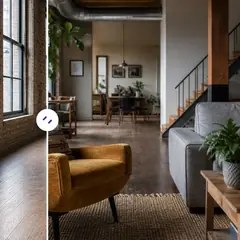
Virtual Staging & Property
AI Room Staging
Stage empty or dated rooms with AI furniture and décor. Create living rooms, bedrooms, offices, dining rooms, and interior style concepts.
Try it now
Photo Enhancement
AI Photo Enhancer
Adjust noise, sharpness, color and scale in one enhancement workflow, then compare the result with the original.
Try it nowGuides for this tool
- How to Prepare Real Estate Listing Photos in Bulk for an AgencyOrganize bulk real estate photo editing with Pixoate. Keep properties, room sequences and concept images clear across an agency's listing workflow.
- How to Remove Temporary Clutter from Real Estate Photos with AIRemove temporary clutter from real estate photos with Pixoate. Review cables and stray objects while preserving the property's actual condition.
Watch each transformation land
Every photo crosses the slash untouched and comes out the other side finished.























